Walls are often the largest surface area in any room, but they frequently go unnoticed in routine cleaning. Over time, they accumulate dust, fingerprints, scuff marks, grease splatters, and general grime, dulling your home’s appearance and contributing to allergens. Learning how to clean walls safely and efficiently can dramatically refresh your living spaces without the need for a full repaint. Asubra Cleaning provides expert tips to keep your walls looking pristine, protecting your investment and enhancing your home’s hygiene.
Why you should clean walls regularly
Beyond just aesthetics, regular wall cleaning offers several important benefits for your home and health.
- Improved Air Quality: Walls accumulate dust, pet dander, pollen, and other airborne particles. Cleaning removes these allergens, contributing to a healthier indoor environment, especially for allergy and asthma sufferers.
- Enhanced Appearance: Dirt, grime, and scuff marks can make even freshly painted walls look dull and dingy. Regular cleaning restores their vibrancy and brightness, making rooms feel fresher and more inviting.
- Extends Paint/Wallpaper Life: Accumulated dirt can degrade paint finishes or wallpaper over time. Removing it regularly helps preserve the integrity and appearance of your wall coverings, delaying the need for repainting or redecorating.
- Prevents Stain Buildup: Addressing dirt and marks promptly prevents them from setting in and becoming permanent stains that are much harder to remove later.
- Eliminates Odors: Walls can absorb cooking odors, pet smells, and smoke. Cleaning helps to neutralize these lingering scents.
- Hygienic Environment: In areas like kitchens and bathrooms, walls can collect grease, splashes, and mildew. Cleaning these surfaces is crucial for maintaining overall home hygiene.
Assess wall finish (paint, wallpaper, tile)
Before you start cleaning, it’s crucial to identify your wall’s finish. Different surfaces require different cleaning approaches to avoid damage.
- Painted Walls:
- Flat/Matte Paint: Most delicate. Highly porous, easily absorbs moisture and cleaners, and can “burnish” (get shiny spots) or lose paint with scrubbing. Use the gentlest methods.
- Eggshell/Satin/Semi-Gloss Paint: More durable and washable. These finishes have a slight sheen that makes them more resistant to stains and easier to clean.
- Gloss Paint: Most durable and washable, common in kitchens and bathrooms. Can withstand more scrubbing.
- Test First: Always test your cleaning solution in an inconspicuous spot (e.g., behind a door, inside a closet) on painted walls to ensure it doesn’t cause discoloration, streaking, or paint removal.
- Wallpaper:
- Washable Vinyl/Coated Wallpaper: Can be gently wiped with a damp cloth and mild solution.
- Non-Washable/Delicate Wallpaper: (e.g., fabric, grasscloth, antique paper) Should only be dusted or very lightly spot cleaned with extreme caution. Avoid moisture.
- Test First: Always test any liquid cleaner on an inconspicuous area of wallpaper, as water or cleaners can cause discoloration or adhesive failure.
- Tile Walls (Kitchens, Bathrooms):
- Characteristics: Generally very durable and easy to clean. Focus is often on the grout lines.
- Considerations: Use cleaners appropriate for tile and grout. Avoid harsh abrasives that can scratch glazed tile or damage grout.
Cleaning solutions by surface type
Tailor your cleaning solution to the specific type of wall for optimal results and safety.
- For Most Painted Walls (Eggshell, Satin, Semi-Gloss):
- General Cleaning: Mix 1 gallon of warm water with 1/4 cup of mild liquid dish soap (e.g., Dawn) or a few drops of a pH-neutral all-purpose cleaner.
- For Tougher Grime: Add 1/2 cup of white vinegar to the above solution. Vinegar helps cut grease and acts as a mild disinfectant.
- For Very Greasy Kitchen Walls: Add 1/4 cup of Borax to the water/dish soap solution.
- For Flat/Matte Painted Walls (Use with extreme caution):
- Dusting: Dry dust only.
- Spot Cleaning: Use a magic eraser (very gently!) on dry paint, or a tiny amount of plain water on a white microfiber cloth, blotting, not rubbing. Avoid liquids if possible.
- For Washable Vinyl/Coated Wallpaper:
- General Cleaning: Mix 1 gallon of warm water with 1/4 cup of mild dish soap.
- Caution: Avoid oversaturating.
- For Tile Walls:
- General Cleaning: Mix 1 gallon of warm water with 1/2 cup of white vinegar OR a dedicated tile cleaner.
- Grout Cleaning: A paste of baking soda and water, or a specialized grout cleaner. (See “Removing Tough Marks and Stains” for more on grout).
Important Note: Always have two buckets: one with your cleaning solution and one with clean plain water for rinsing.
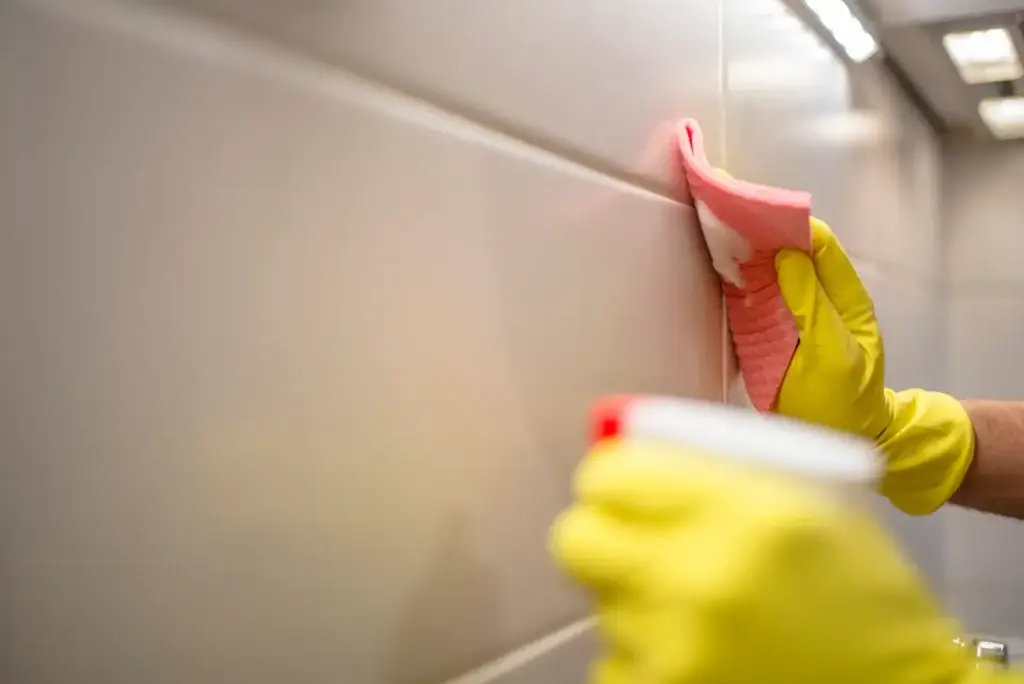
Tools & techniques (microfiber, soft sponges)
The right tools and a gentle technique are crucial for effective, damage-free wall cleaning.
Tools:
- Drop Cloths or Old Towels: To protect floors and furniture from drips.
- Two Buckets: One for cleaning solution, one for clean rinse water.
- Microfiber Mop with Extendable Handle: Ideal for large wall areas, especially ceilings. Use with a clean, damp microfiber mop head.
- Soft Microfiber Cloths or Sponges: For general wiping and spot cleaning. Ensure they are clean and white (to avoid color transfer).
- Old Toothbrush or Small Detail Brush: For cleaning around light switches, outlets, trim, and tight corners.
- Vacuum Cleaner with Brush Attachment: For dusting walls before wet cleaning.
Techniques:
- Dust First: Before applying any liquid, thoroughly dust your walls using a vacuum cleaner with a soft brush attachment, a microfiber duster, or a dry microfiber mop. This removes loose dust and cobwebs, preventing them from turning into muddy streaks when wet.
- Test in Inconspicuous Area: Always test your chosen cleaning solution and method on a small, hidden spot on the wall (e.g., behind a door, behind a picture) to ensure no discoloration or damage occurs. Let it dry completely before assessing.
- Work from Bottom to Top (when applying solution): When cleaning an entire wall with a liquid solution, start cleaning from the bottom and work your way up. This prevents dirty streaks from running down onto already clean areas.
- Rinse from Top to Bottom: After cleaning a section, immediately rinse it with a clean cloth dampened with plain water, working from top to bottom. This removes any cleaning solution residue, which can cause streaks.
- Use Light Pressure: Use gentle, consistent pressure. Scrubbing too hard, especially on matte paint, can damage the finish, cause “burnishing” (shiny spots), or remove paint.
- Clean in Sections: Work on small sections (e.g., 2×2 feet) at a time to prevent the cleaning solution from drying on the wall before you can rinse it.
- Change Water Frequently: Change both your cleaning solution and rinse water often to avoid spreading dirt.
Removing tough marks and stains
Specific marks require targeted approaches.
- Scuff Marks:
- Method: Gently rub the scuff mark with a clean Mr. Clean Magic Eraser (or similar melamine foam sponge). Use minimal pressure and test first, as these can remove paint if used too aggressively. For painted walls, blot a clean cloth dampened with rubbing alcohol.
- Crayon Marks:
- Method 1 (Non-Abrasive): Apply a small amount of non-gel toothpaste or mayonnaise to the crayon mark. Let it sit for 5-10 minutes, then gently rub with a damp cloth.
- Method 2 (For tougher marks): Use a Mr. Clean Magic Eraser gently.
- Ink/Marker Stains:
- Method: Dab with a cotton swab or cloth lightly dampened with rubbing alcohol, hairspray, or acetone-free nail polish remover (test first! especially on wallpaper or delicate paint). Blot, don’t rub.
- Grease Splatters (Kitchen Walls):
- Method: Use a strong solution of warm water and dish soap (like Dawn), or a solution with a little white vinegar. Gently wipe with a microfiber cloth. For stubborn grease, a paste of baking soda and water can be gently rubbed on.
- Grout Stains/Mold (Tile Walls):
- Method: Mix baking soda with a little water to form a paste. Apply the paste to the grout lines and let it sit for 10-15 minutes. Scrub with an old toothbrush or a grout brush. Rinse thoroughly. For persistent mold, a solution of 1 part bleach to 3 parts water can be used (test first, ensure ventilation, and never mix bleach with vinegar).
Maintaining clean walls long-term
Preventative measures significantly reduce the need for deep cleaning.
- Dust Regularly: Make wall dusting a part of your routine. Use an extendable duster or a vacuum with a brush attachment to remove cobwebs and dust every few weeks.
- Address Spills & Marks Immediately: Don’t let spills or marks set. Wipe them up as soon as they occur.
- Use Washable Paint: When repainting, opt for washable finishes like eggshell, satin, or semi-gloss, especially in high-traffic areas, kitchens, and bathrooms.
- Protect High-Traffic Areas: Consider placing clear wall protectors behind door handles or in areas where furniture frequently scrapes the wall.
- Ventilate Bathrooms & Kitchens: Use exhaust fans to reduce moisture and grease buildup on walls in these areas.
- Clean Hands: Encourage family members to wash hands regularly and avoid touching walls with dirty hands.
By incorporating these safe and efficient cleaning tips, your walls will consistently contribute to a clean, fresh, and inviting atmosphere throughout your home.
Tired of battling dusty or marked walls? Asubra Cleaning offers professional wall cleaning services, utilizing safe and effective techniques to restore your walls’ freshness and brightness without damage. Let us handle the high-reach and detailed work, so your home looks impeccably clean from floor to ceiling. Contact us today for a free estimate!