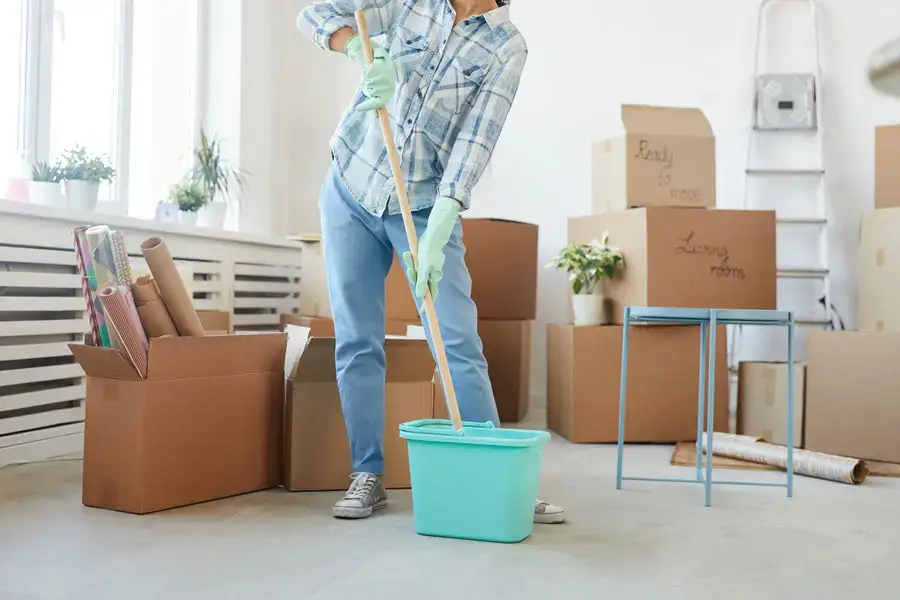
Relocating to a new home is a significant life event that involves a complex series of logistics, from organizing packing boxes to updating your address across various accounts. Amidst the whirlwind of changing residences, the condition in which you leave your previous home often dictates the final impression you make on landlords or new owners. Ensuring the property is returned to its original state is not merely a courtesy; it is frequently a contractual obligation tied to the return of security deposits or the closing of a real estate sale.
Consequently, the process requires more than a superficial sweep; it demands a strategic approach to ensure every corner is addressed. By dedicating time to a systematic cleaning plan, you can mitigate the stress associated with moving deadlines and potential disputes over property conditions. This guide explores the essential steps required to achieve a pristine environment, ensuring that you close the loop on your residency with professionalism and care.
The Importance of a Comprehensive Deep Clean
When you are preparing to vacate a property, the standard for cleanliness is significantly higher than typical weekly maintenance. A move out cleaning is a specialized process designed to reset the home to a neutral, welcoming state for the next inhabitants. Whether you are in a bustling city apartment or a suburban home in Massachusetts, the goal remains the same: to eliminate all traces of the previous occupancy. This level of house cleaning ensures that the space feels fresh and sanitary.
Furthermore, a thorough deep clean protects your financial interests. For renters, the security deposit is often contingent upon the unit being left in the same condition as when it was rented, barring normal wear and tear. For homeowners selling a property, a sparkling clean home can be the deciding factor for buyers doing a final walkthrough. Therefore, investing effort into a detailed move out cleaning is an investment in a smooth transition to your next chapter.
5 Ways to Tackle the Kitchen Deep Clean
The kitchen is often the most labor-intensive area when performing a move out cleaning. Grease, crumbs, and food residue have a tendency to accumulate in hidden areas over time. To ensure this high-traffic zone is spotless, you must look beyond the countertops and address the appliances and storage spaces that often go overlooked during regular cleaning routines.
- Revitalizing Major Appliances: The oven and refrigerator are the centerpieces of the kitchen and require significant attention during a move out cleaning. For the oven, remove the racks and use a specialized cleaner or a baking soda paste to lift burnt-on carbon and grease. Similarly, the refrigerator should be emptied, defrosted if necessary, and scrubbed inside and out. Don’t forget to pull the appliances out to clean the floor underneath, as this is a prime spot for dust and debris.
- Sanitizing Cabinets and Drawers: Emptying the cupboards is only the first step. You must wipe down the interior and exterior of every cabinet and drawer to remove dust, crumbs, and sticky spots. Pay close attention to the tops of the cabinets, where grease and dust often mix to form a stubborn layer. A proper move out cleaning ensures that the next person to open a drawer finds nothing but a clean surface.
- Degreasing the Range Hood and Backsplash: Cooking oils eventually settle on surfaces above and behind the stove. During your move out cleaning, remove the range hood filter and soak it in hot, soapy water to dissolve the grease. Simultaneously, scrub the backsplash to remove any splatters. This step is crucial for eliminating lingering food odors and leaving the kitchen smelling fresh.
- Polishing Sinks and Fixtures: The kitchen sink can harbor bacteria and mineral deposits. Scrub the basin thoroughly and use a descaling agent to remove limescale from the faucet. If you have a garbage disposal, ensure it is clean and odor-free. Polishing the fixtures to a high shine adds a visual cue of cleanliness that is essential for a successful move out cleaning.
- Addressing Countertops and Islands: Finally, sanitize all food preparation surfaces. While this seems obvious, a move out cleaning requires you to lift any remaining appliances or decor to clean underneath them. Check the edges of the countertops and the underside of the lip, where spills often drip and dry unnoticed.
5 Ways to Refresh Bathrooms and Plumbing Fixtures
Bathrooms are scrutinized heavily during move-out inspections. Because these rooms are subject to high humidity, they are prone to mold and mildew buildup. A successful move out cleaning in the bathroom requires targeted efforts to sanitize surfaces and restore the shine to porcelain and chrome fixtures.
- Descaling Showers and Tubs: Soap scum and hard water stains can make a bathroom look dingy. Apply a strong cleaner to the shower walls, bathtub, and glass doors, allowing it to sit and break down the deposits. Scrub the grout lines vigorously to remove any discoloration. A move out cleaning is incomplete without a sparkling shower area that looks unused.
- Sanitizing the Toilet: This goes beyond a quick brush. You must clean the bowl, the seat, the lid, and the exterior of the tank. Crucially, clean the base of the toilet where it meets the floor, as well as the area behind the toilet. These hard-to-reach spots are often missed but are critical for a comprehensive move out cleaning.
- Clearing Drains and Pipes: Ensure that all sinks and tub drains are flowing freely. Remove any hair or debris that may be clogging the stoppers. While you are not expected to be a plumber, ensuring that the plumbing fixtures appear functional and clean is a key part of the move out cleaning.
- Polishing Mirrors and Glass: Streaks on mirrors can make a clean bathroom look messy. Use a glass cleaner and a microfiber cloth to achieve a streak-free shine. Check for toothpaste splatters on the mirror and water spots on any glass shelving. In the context of a move out cleaning, lighting plays a big role, so ensure light fixtures above the mirror are also dusted and clean.
- Scrubbing Vanities and Medicine Cabinets: Just like the kitchen, bathroom storage needs to be emptied and wiped out. Remove any shelf liners that are peeling or dirty. Wipe down the vanity doors and handles. A thorough move out cleaning ensures that no personal items, such as bobby pins or razor caps, are left behind in the drawers.
5 Ways to Restore Living Areas and Bedrooms
While living rooms and bedrooms generally lack the heavy grime found in kitchens and bathrooms, they present their own challenges regarding dust and surface preservation. A move out cleaning in these areas focuses on removing the dust that has settled over the years and ensuring that the structural elements of the room look well-maintained.
- Dusting Ceiling Fans and Light Fixtures: Dust accumulates heavily on the tops of ceiling fan blades and inside light fixtures. Before vacuuming the floors, start at the top of the room. Carefully wipe down fan blades and remove dead bugs or dust from light covers. This top-down approach is a hallmark of an efficient move out cleaning.
- Wiping Down Walls and Baseboards: Over time, walls collect dust, fingerprints, and scuff marks. Spot clean the walls with a gentle sponge to remove marks without damaging the paint. Baseboards are notorious dust magnets; they should be vacuumed and wiped down with a damp cloth. This detail significantly brightens the room and is a standard expectation for a move out cleaning.
- Cleaning Windows and Blinds: Natural light reveals dust easily. Clean the interior of the windows, ensuring the glass is streak-free. Dust the blinds or wash curtains if they are staying with the property. Don’t forget the window sills and tracks, which often collect dead insects and dirt. Including windows in your move out cleaning makes the entire home feel airier.
- Addressing Doors and Switch Plates: High-touch areas like doorknobs, door frames, and light switch plates can become grimy and discolored. Wipe these down with a disinfectant. It is a small detail, but in a move out cleaning, these touchpoints contribute to the overall sense of hygiene in the home.
- Vacuuming and Cleaning Closets: Closets are often neglected until the very end. Once your clothes are packed, vacuum the closet floors and wipe down any shelving. Check for cobwebs in the corners. A move out cleaning should ensure that the next resident can hang their clothes immediately without worrying about dust.
5 Ways to Handle Floors and Carpets
Floors take the most abuse in any home. Whether you have hardwood, tile, or carpet, the flooring is the largest surface area you need to address. In regions like Massachusetts, where seasonal weather brings in salt, sand, and mud, floors may require extra attention during a move out cleaning.
- Deep Cleaning Carpets: Vacuuming is essential, but it may not be enough. If you have pets or if the carpets are stained, steam cleaning might be necessary. This lifts deep-seated dirt and odors, refreshing the fibers. Including carpet shampooing in your move out cleaning plan is often a lease requirement for renters with pets.
- Mopping Hard Surfaces: Sweep or vacuum hard floors to remove loose debris before mopping. Use a cleaner appropriate for the floor type—wood, tile, or laminate. Change the water frequently to avoid spreading dirt around. A streak-free floor is the foundation of a good move out cleaning.
- Addressing Grout Lines: On tile floors, grout can become dark and discolored. Scrubbing the grout lines can dramatically improve the appearance of the floor. While labor-intensive, this step elevates the quality of your move out cleaning substantially.
- Repairing Minor Floor Damage: If there are deep scratches in hardwood or chips in the tile that go beyond normal wear and tear, consider minor repairs. While not strictly “cleaning,” addressing these issues while performing your move out cleaning can save you money on security deposit deductions.
- Final Sweep and Vacuum: As the very last step before locking the door, do one final sweep or vacuum. Foot traffic from the moving process itself brings in new dirt. This final pass ensures that your move out cleaning remains pristine for the final inspection.
5 Ways to Manage the Final Walkthrough Logistics
The actual cleaning is only part of the equation; managing the logistics of the move-out process ensures that your hard work is recognized. A strategic approach to the final days of your residency helps coordinate the move out cleaning with the chaos of moving trucks and inspections.
- Timing the Cleaning: Ideally, the move out cleaning should happen after all furniture and boxes have been removed. Cleaning an empty house is significantly faster and allows you to spot issues that were previously hidden. Schedule your move a day or two before your lease ends to allow ample time for this deep clean.
- Gathering the Right Supplies: You cannot perform an effective move out cleaning without the proper tools. Ensure you have heavy-duty trash bags, microfiber cloths, scrub brushes, a vacuum with attachments, and various cleaning agents. Running out of supplies mid-clean breaks your momentum.
- Creating a Checklist: Do not rely on memory. Create a checklist based on your lease agreement or real estate contract. Tick off each item as you complete it. This ensures that no aspect of the move out cleaning is forgotten in the rush.
- Documenting the Condition: Once the move out cleaning is complete, take photos and videos of every room. This serves as proof of the property’s condition should any disputes arise later regarding the security deposit. Documentation is the safety net for your hard work.
- Scheduling the Inspection: Try to be present for the final walkthrough with the landlord or new owner. This allows you to address any immediate concerns they might have regarding the move out cleaning. Being there demonstrates your commitment to leaving the property in good standing.
The Final Chapter
Transitioning to a new home is a multifaceted process where the physical act of moving is only half the battle. The effort you pour into the final move out cleaning serves as the closing statement of your time in that residence. It reflects a sense of responsibility and respect for the property and its future occupants. By methodically addressing every room, from the grease in the kitchen to the dust on the baseboards, you ensure a seamless handover that protects your financial interests and your reputation as a tenant or homeowner.
Ultimately, a rigorous move out cleaning provides peace of mind. It allows you to hand over the keys with confidence, knowing that you have fulfilled your obligations to the highest standard. As you drive away toward your new beginning, you can do so without the lingering worry of cleaning fees or disputes, fully ready to start fresh in your new environment.